Messing Around with Meade's DSI-Pro |
| The introduction of
Meade's inexpensive line of CCD cameras for astro-imaging
was no surprise. Although their initial attempts to enter
the amateur CCD market were flops, it was unlikely that
this aggressive company would sit by while others cashed
in on anything to do with astronomy. And market-oriented
companies like Meade know their customers: the DSI was
aimed at the late-starting would-be imager on a tight
family budget. So what got me interested? At the Winter Star Party 2005, I was talking with Scott Roberts of Meade. He mentioned that the venerable Cookbook camera had been an inspiration for the DSI series. Scott related how he had seen the Cookbook, and was impressed at the speedy image display and overall ease of use. Maybe I was a little jealous, or maybe just plain curious, but I had to see what Meade had accomplished. And Scott, bless his heart, reached into bin full of DSI cameras and tossed it to me and Jim Burnell. Jim tried it first. He got it to work but gave up on it as a serious CCD camera. He sent it to me. I can honestly say that it was a bear to install and a pain in the butt to operate. The DSI is a Bayer-array color camera that works over a USB connector. The software was buggy and froze up. I had to reinstall the USB drivers over and over, and even then it seemed to be hit-or-miss whether my laptop would recognize the DSI when I plugged it in. The field of view was microscopic. The sensitivity of the camera was terrible. The color rendition in the images was terrible. But once in a while everything worked, and images actually popped up on the computer screen. When the DSI-Pro was announced, we briefly considered writing a book for new users who were sure to find imaging with these low-end cameras daunting -- so I "invested" in a DSI-Pro. Meade had upgraded the software somewhat. Chatter on the DSI listserve suggested that the DSI-Pro's performance improved remarkably with a powered Belkin USB 2.0 adapter. This proved to be true: with USB 1.1, the camera was sluggish; with USB 2, it was pretty snappy. |
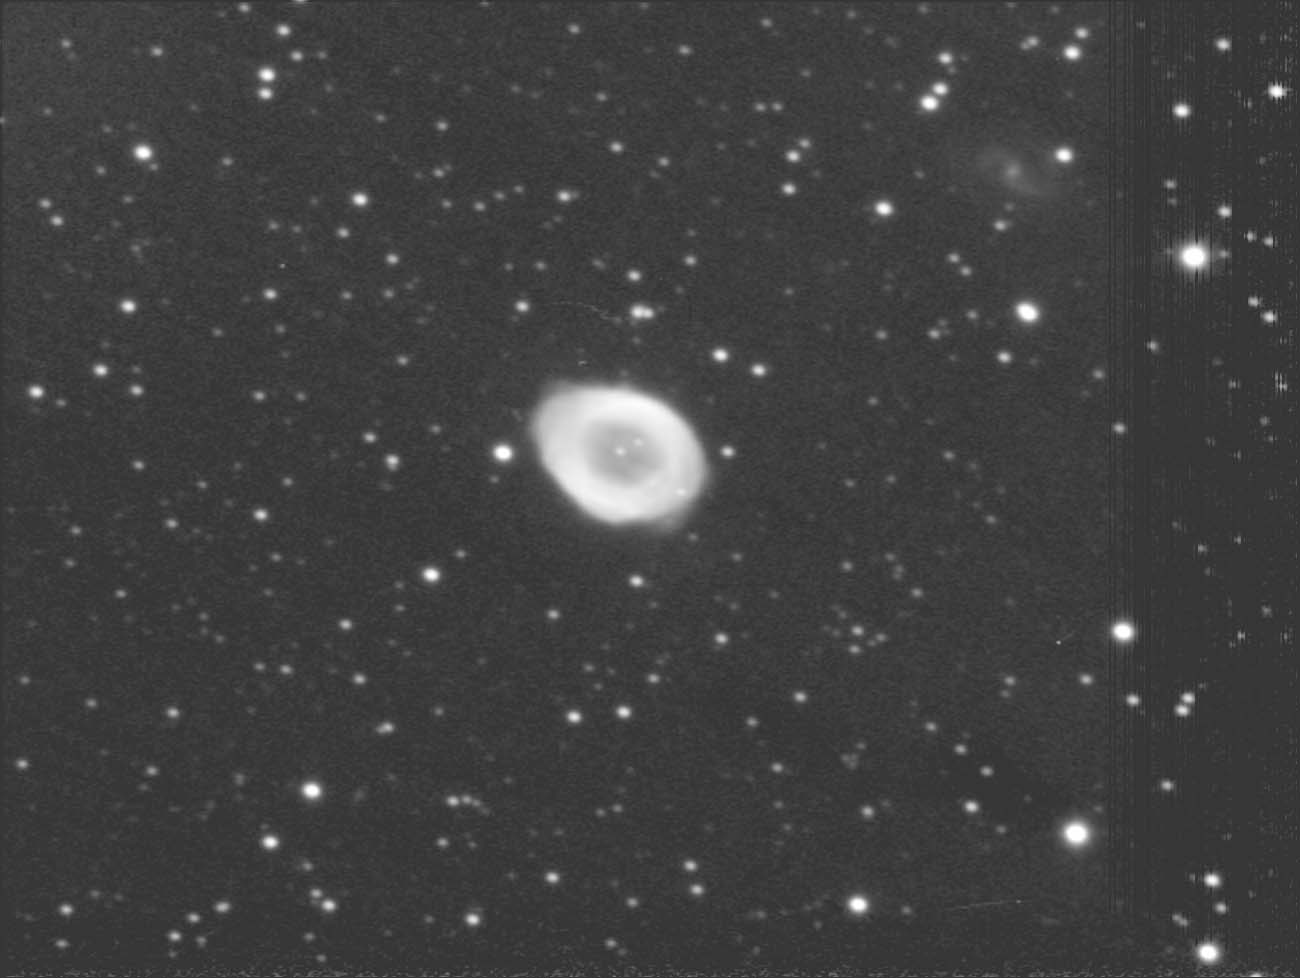 |
The image of the Ring Nebula was the first decent image I managed to take with the DSI-Pro. I took it using my faithful 6-inch f/5 Newtonian and Byers 812 mounting. This is a stack of 74 exposures each 15 seconds long, with no tracking or guiding. The Ring Nebula picture was taken in the fall of 2005 from my half-completed observatory. When I got my observatory fully operational early in summer 2006, I shot the four images that follow. All of them were made using my 6-inch f/5 Newtonian and Byers 812 with no tracking or guiding. After a lot of experimenting, I gave up using the Meade software for anything but capturing the raw images. Testing showed that Meade's dark-subtraction did a pretty good job, and if I set it so that the capture program would save every image in the FITS format, I could stack the images using AIP4Win to get what I consider better results than Meade's software delivers. In my experiments, the Meade software wasted a lot of usable exposures. |
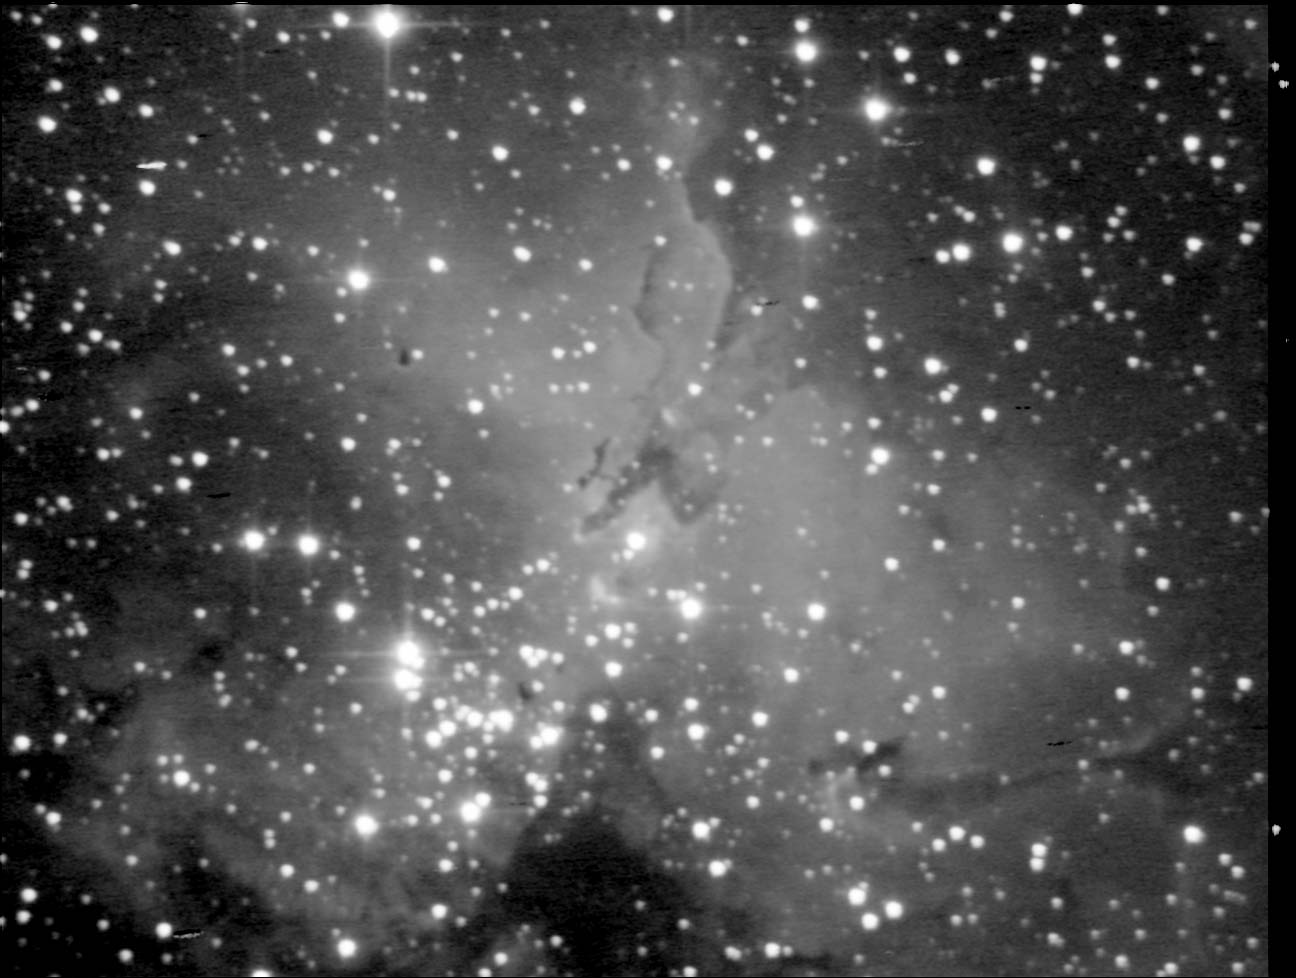 |
The Eagle Nebula: 23 exposures x 30 seconds. |
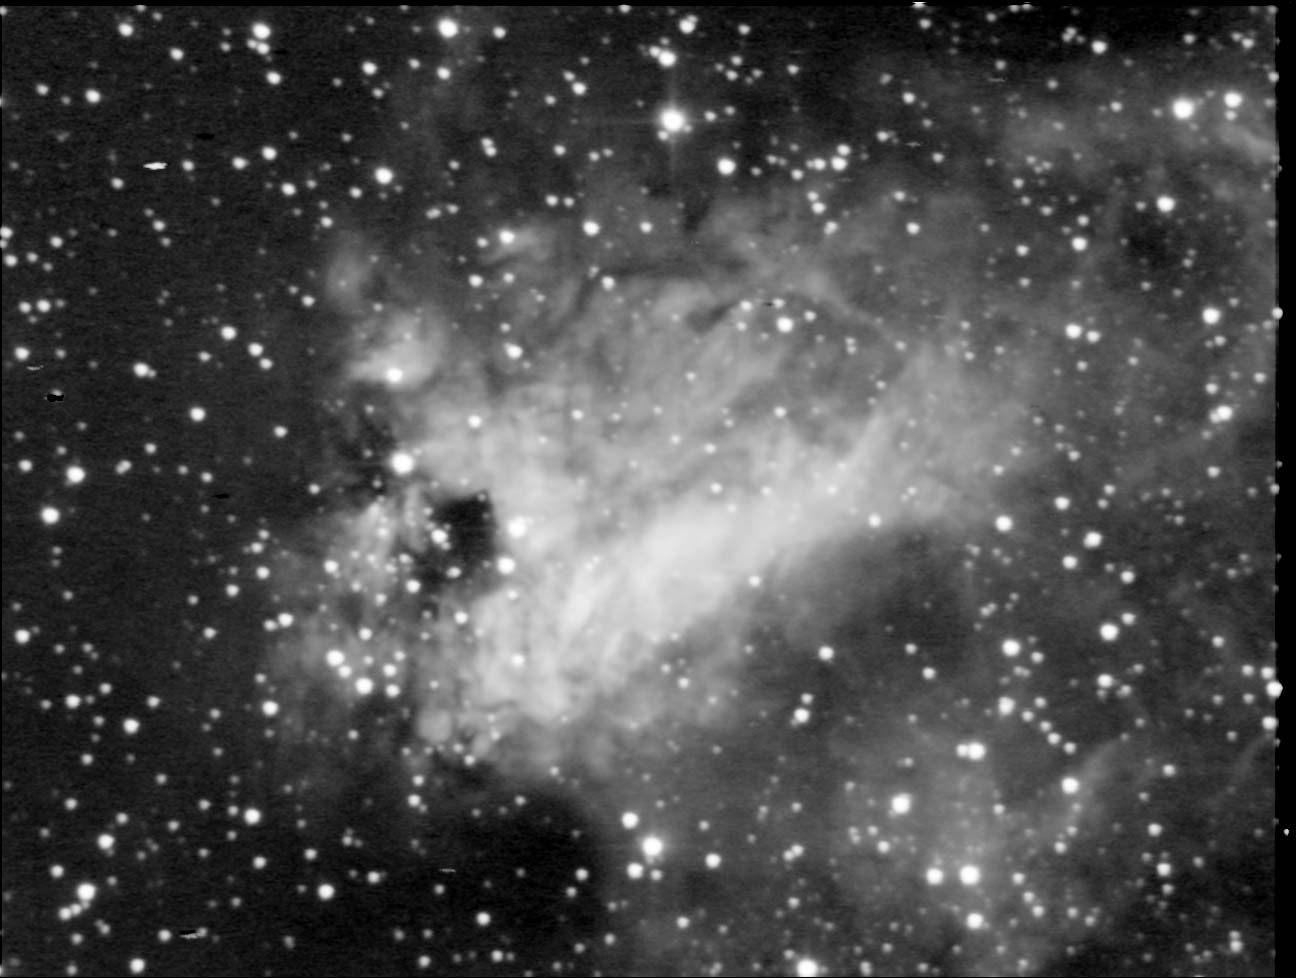 |
The Omega Nebula: 20 exposures x 30 seconds. |
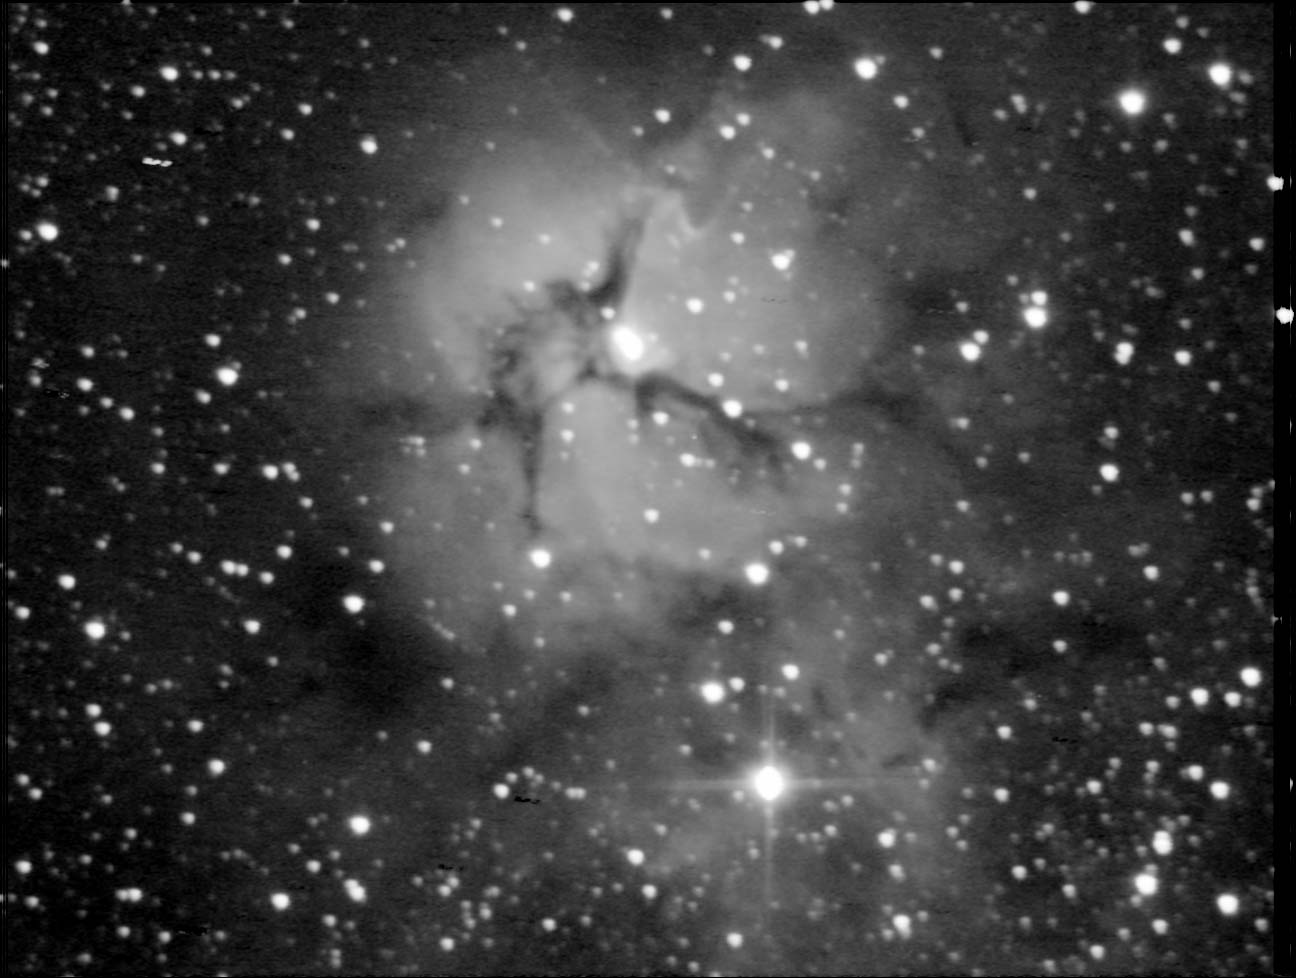 |
The Trifid Nebula: 20 exposures x 30 seconds. |
 |
The Lagoon Nebula: 20 exposures x 30 seconds. |
The DSI-Pro is roughly comparable to the Cookbook 245 in terms of sensitivity and noise. On bright objects with an f/5 telescope, you can achieve a pretty good signal-to-noise ratio in about ten minutes total exposure time. In summer, Meade's software does a good job dark-subtracting 30-second exposures and less well with 60-second exposures. In winter, when it's cooler, the longer exposures might be superior. I use Meade's Envision software to capture the image sequences. I put the camera into auto mode with a 0.1-second exposure and center on a bright star. I then use MicroSoft's Magnifier program to blow up the image really big on the screen. Focusing is easy because my Newtonian's diffraction spikes split into two parallel lines when the image is slightly out of focus. Then I lock the focus, close down Magnifier, increase the exposure to 2 seconds, move to my target, and center it. I make sure that I've got the right filename set up, check the dark-subtract box, verify that it's set to save all images, reset the long exposure time to 30 seconds, and then leave everything alone for 10 to 20 minutes while 20 to 40 images accumulate. To make the images shown above, I used the MultiImage > DeepSky tool in AIP4Win. I set it for 2x resampling and let AIP4Win stack the image series. This means that all of the images here were made at twice normal size, and I show them here at about 150% of their orignal size. Post-stack processing with these images was minimal; I used the Brightness Scaling Tool with Sigmoid scaling, and touched up the final contrast before exporting the images you see here. The DSI-Pro works because the Sony Super-HAD CCD chip has incredibly low dark current. The DSI-Pro, running at outdoor temperatures, throws away most of that advantage, but not all of it. On a cool night you can expose for several minutes. The aluminum housing is crudely cast and minimally machined. Inside the DSI and DSI-Pro is just one circuit board. The software is coded in VS.net C++, and it uses a lot of memory and needs a lot of processor power to perform adequately. I haven't tried to make color images with this camera. Adding filters will reduce the amount of light reaching the chip, so dark current and readout noise will inevitably lead to either considerably longer exposures or much noisier images, which seems to me like a lose-lose situation. However, for monochrome imaging the DSI-Pro does well enough to be fun to mess around with. --Richard Berry |
Return to Richard Berry's Home Page |